Nginx is very easy to install if we install it from a package manager like apt on Ubuntu or yum in CentOS. It is good for a general proposed load balancer, reverse proxy, and web server. But sometimes we need additional modules to add more function to Nginx that is not included in default installation from the package manager. If that is the case, you need to install the Nginx from source. In this tutorial, we will guide you step by step on how to install Nginx from source on ubuntu.
Sudo Privileges
Before starting, make sure that we have no permission issue on the installation & configuration.
sudo su
Install Dependencies
Run this command to install Nginx dependencies
apt update -y && apt-get install git build-essential libpcre3 libpcre3-dev zlib1g zlib1g-dev libssl-dev libgd-dev libxml2 libxml2-dev uuid-dev
Download Nginx Source Code
Before you download the Nginx source code, you can visit http://nginx.org/en/download.html to see the Nginx version available now. After that you can download them by running this command:
wget http://nginx.org/download/nginx-<version>.tar.gz
Now, the latest stable version is 1.20.2, so for me, I will download the nginx-1.20.2 version
wget http://nginx.org/download/nginx-1.20.2.tar.gz
Extract the downloaded file
tar -zxvf nginx-1.20.2.tar.gz
Build & Install Nginx
After extract the file, go to the nginx directory
cd nginx-1.20.2
Now is the time to configure Nginx that suits your need, this is where you put in the module you want to include in Nginx using the ./configure command. The full documentation is in here: Building Nginx from Sources. For now, I will give you the minimum configure option so you can build a good load balancer, reverse proxy, or webserver. Run this command to configure Nginx:
./configure \
    --prefix=/etc/nginx \
    --conf-path=/etc/nginx/nginx.conf \
    --error-log-path=/var/log/nginx/error.log \
    --http-log-path=/var/log/nginx/access.log \
    --pid-path=/run/nginx.pid \
    --sbin-path=/usr/sbin/nginx \
    --with-http_ssl_module \
    --with-http_v2_module \
    --with-http_stub_status_module \
    --with-http_realip_module \
    --with-file-aio \
    --with-threads \
    --with-stream \
    --with-stream_ssl_preread_module
After that, run this command to build & install the Nginx
make && make install
To verify the installation, you can check the Nginx version
nginx -V
Also notice that the Nginx folder will be created at /etc/nginx that provide the default nginx.conf and other file.
As I mentioned before that you need to configure nginx that suits your need. If you already have a use case in mind, you can check my other article that take advantage of nginx built from source:
- Multi Domain Configuration in Layer 4 Nginx Load Balancer
- Build an Adaptive Bitrate Streaming Server Using Nginx on Ubuntu
- Adaptive Bitrate VoD Server using Nginx on Ubuntu
Create Systemd File
To make Nginx easier to manage, we can build a systemd file. First, create a new file in the systemd folder:
nano /lib/systemd/system/nginx.service
And then copy & paste this config to the file
[Unit]
Description=Nginx Custom From Source
After=syslog.target network-online.target remote-fs.target nss-lookup.target
Wants=network-online.target

[Service]
Type=forking
PIDFile=/run/nginx.pid
ExecStartPre=/usr/sbin/nginx -t
ExecStart=/usr/sbin/nginx
ExecReload=/usr/sbin/nginx -s reload
ExecStop=/bin/kill -s QUIT $MAINPID
PrivateTmp=true

[Install]
WantedBy=multi-user.target
Reload the systemd
systemctl daemon-reload
Enable Nginx service so it will auto start when the server boot
systemctl enable nginx
Now you can control Nginx using systemd, just like this:
service nginx start
service nginx stop
service nginx reload
service nginx restart
Create Logrotate File
Logrotate is useful for rotating the Nginx log so it will not write on a single file continuously. First, create a new file on the logrotate folder
nano /etc/logrotate.d/nginx
Copy & Paster this code
/var/log/nginx/*.log {
    daily
    missingok
    rotate 7
    compress
    delaycompress
    notifempty
    create 0640 root root
    sharedscripts
    prerotate
            if [ -d /etc/logrotate.d/httpd-prerotate ]; then \
                    run-parts /etc/logrotate.d/httpd-prerotate; \
            fi \
    endscript
    postrotate
            invoke-rc.d nginx rotate >/dev/null 2>&1
    endscript
}
Final Check
To tell that the overall installation success, you can check the Nginx webserver is working or not by starting the Nginx service.
service nginx start
Check the status
service nginx status
Visit your Nginx server from your browser
http://<nginx-ip-address>
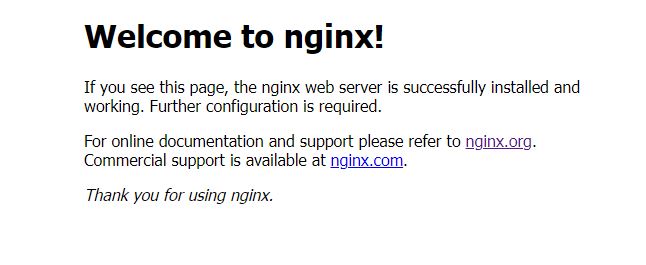
You should see the default Nginx landing page like this:
That’s it! Now you can install your own Nginx from source and put in modules that you want to include in Nginx.
