A live stream served at a single bitrate forces an ugly choice: encode high and buffer endlessly for viewers on weak connections, or encode low and look terrible for everyone. Adaptive bitrate (ABR) streaming solves it by offering the same stream at several quality levels and letting each player pick, and switch, based on its actual bandwidth.
In this tutorial you will build an adaptive bitrate live streaming server on Ubuntu using Nginx and the nginx-rtmp-module: ingest an RTMP feed from OBS (or FFmpeg), transcode it into three quality renditions on the fly, package them as HLS, and play the result in VLC. If you want the video-on-demand counterpart (pre-recorded files instead of live feeds), see How to Build an Adaptive Bitrate VoD Server with Nginx VOD Module.
How the Pieces Fit Together
  OBS ---rtmp--> [ application streaming ] --exec ffmpeg--> [ application hls ] --HLS--> viewers
                        (ingest)              (transcode)      (package+serve)
- Ingest: Nginx’s RTMP server listens on port 1935. Your encoder (OBS, FFmpeg, a hardware encoder) pushes the live feed to it.
- Transcode: the moment a stream arrives, Nginx spawns an FFmpeg process that re-encodes it into three renditions (low/mid/high bitrate) and pushes each back into a second RTMP application.
- Package and serve: that second application turns each rendition into HLS, which is just short
.tsvideo segments plus.m3u8playlists. A master playlist ties the renditions together so players can switch between them mid-stream.
The nginx-rtmp-module is a third-party module, so Nginx must be compiled from source with it. That is most of the installation work below.
Prerequisites
- A server running Ubuntu 22.04 or 24.04 LTS
- A user with
sudoprivileges - Enough CPU for live transcoding. Three x264 renditions of a 720p feed want roughly 4 modern cores; transcoding is by far the heaviest part of this setup
- Port
1935(RTMP ingest) and8080(HLS playback) reachable through your firewall - OBS Studio (or FFmpeg) on another machine to act as the stream source, and VLC to play the result
Step 1: Install Build Dependencies
sudo apt update
sudo apt install build-essential git libpcre2-dev libssl-dev zlib1g-dev
libpcre2-dev is the current PCRE library. Nginx switched to PCRE2 in 1.21.5, so the old libpcre3-dev from older tutorials is no longer the right choice.
Step 2: Download the Nginx Source Code
Check nginx.org/en/download.html for the current stable version and set it once:
NGINX_VER=1.30.1
wget http://nginx.org/download/nginx-${NGINX_VER}.tar.gz
tar -zxvf nginx-${NGINX_VER}.tar.gz
Step 3: Download the RTMP Module
The module lives at github.com/arut/nginx-rtmp-module. The latest tagged release is v1.2.2:
wget https://codeload.github.com/arut/nginx-rtmp-module/tar.gz/refs/tags/v1.2.2 -O nginx-rtmp-module-1.2.2.tar.gz
tar -zxvf nginx-rtmp-module-1.2.2.tar.gz
You now have two folders side by side: nginx-1.30.1 and nginx-rtmp-module-1.2.2. Keep them in the same parent directory so the relative path in the next step works.
Step 4: Build and Install Nginx
cd nginx-${NGINX_VER}
Configure the build with the RTMP module added:
./configure \
    --prefix=/etc/nginx \
    --conf-path=/etc/nginx/nginx.conf \
    --error-log-path=/var/log/nginx/error.log \
    --http-log-path=/var/log/nginx/access.log \
    --pid-path=/run/nginx.pid \
    --sbin-path=/usr/sbin/nginx \
    --with-http_ssl_module \
    --with-http_v2_module \
    --with-http_stub_status_module \
    --with-http_realip_module \
    --with-file-aio \
    --with-threads \
    --with-stream \
    --add-module=../nginx-rtmp-module-1.2.2
Compile and install:
make
sudo make install
Verify:
nginx -V
The output should list your version and show --add-module=../nginx-rtmp-module-1.2.2 among the configure arguments.
Step 5: Configure the Basic Streaming Server
Start with a simple single-bitrate configuration to prove the pipeline works, then add ABR on top. Back up the default config and create a new one:
cd /etc/nginx
sudo mv nginx.conf nginx.conf.old
sudo nano nginx.conf
user www-data;
worker_processes auto;
worker_rlimit_nofile 8192;
pid /run/nginx.pid;
rtmp_auto_push on;

events {
    worker_connections 4096;
}

rtmp {
    server {
        listen 1935;
        chunk_size 4096;
        max_message 1M;

        application streaming {
            live on;
            hls on;
            hls_nested on;
            hls_path /var/www/live;

            hls_fragment 6s;
            hls_playlist_length 30s;
        }
    }
}

http {
    server {
        listen 8080;
        root /var/www;

        location /live {
            types {
                application/vnd.apple.mpegurl m3u8;
                video/mp2t ts;
            }
            add_header Cache-Control no-cache;
            add_header Access-Control-Allow-Origin *;
        }
    }
}
Create the HLS output directory:
sudo mkdir -p /var/www/live
sudo chown www-data:www-data /var/www/live
How it works: the rtmp block receives the feed on port 1935 under the /streaming application, writes HLS segments into /var/www/live, and the http block serves those .m3u8 playlists and .ts segments on port 8080. (Serving HLS from /var/www instead of /etc/nginx keeps generated media out of your configuration directory.)
Values worth tuning:
max_message 1Mis the maximum size of one RTMP message. Increase it for very high bitrate (4K) ingest feeds.hls_fragment 6smakes each.tssegment 6 seconds long. Shorter fragments (3s) reduce latency but create more files and more request overhead.hls_playlist_length 30ssets how much video the live playlist window holds; with 6-second fragments that is 5 segments. Shrinking both values (say 3s/18s) makes the stream more “real-time” at the cost of less buffer for viewers on unstable networks.
Test the configuration:
sudo nginx -t
Step 6: Create the systemd Service
A source-built Nginx does not come with a service unit, so create one:
sudo nano /lib/systemd/system/nginx.service
[Unit]
Description=Nginx Custom From Source
After=syslog.target network-online.target remote-fs.target nss-lookup.target
Wants=network-online.target

[Service]
Type=forking
PIDFile=/run/nginx.pid
ExecStartPre=/usr/sbin/nginx -t
ExecStart=/usr/sbin/nginx
ExecReload=/usr/sbin/nginx -s reload
ExecStop=/bin/kill -s QUIT $MAINPID
PrivateTmp=true

[Install]
WantedBy=multi-user.target
Enable and start it:
sudo systemctl daemon-reload
sudo systemctl enable --now nginx
Step 7: Create the Logrotate File
Keep the access and error logs from growing without bound:
sudo nano /etc/logrotate.d/nginx
/var/log/nginx/*.log {
    daily
    missingok
    rotate 7
    compress
    delaycompress
    notifempty
    create 0640 root root
    sharedscripts
    postrotate
            [ -f /run/nginx.pid ] && kill -USR1 $(cat /run/nginx.pid)
    endscript
}
The USR1 signal tells Nginx to reopen its log files after rotation.
Step 8: Test the Basic Stream
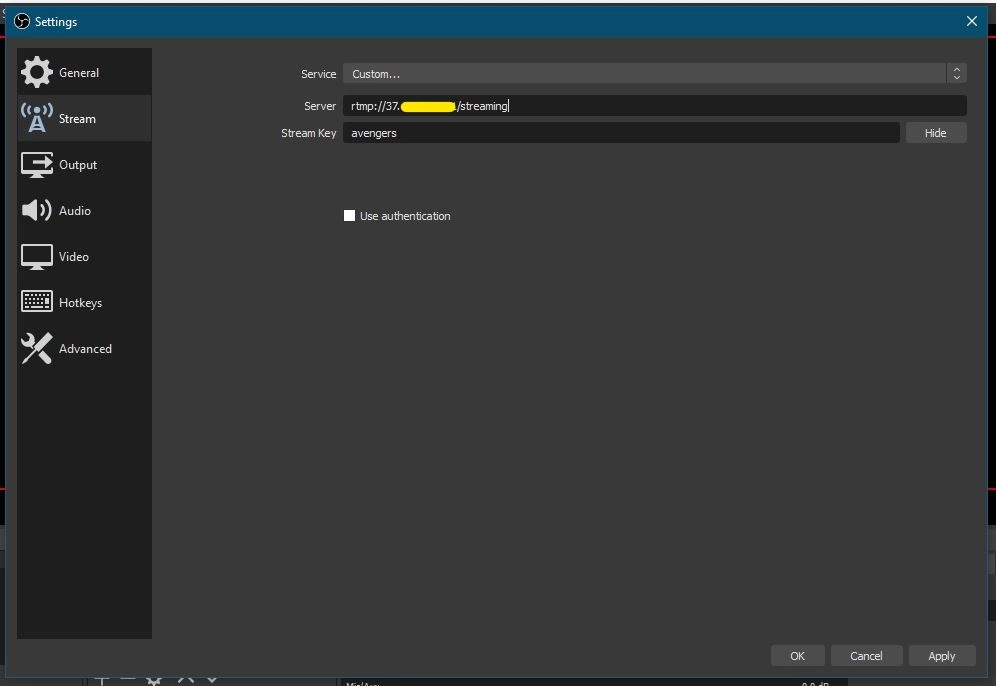
Feed the server with OBS: set the stream server to rtmp://<your-server-ip>/streaming and pick any stream key. This tutorial uses avengers:
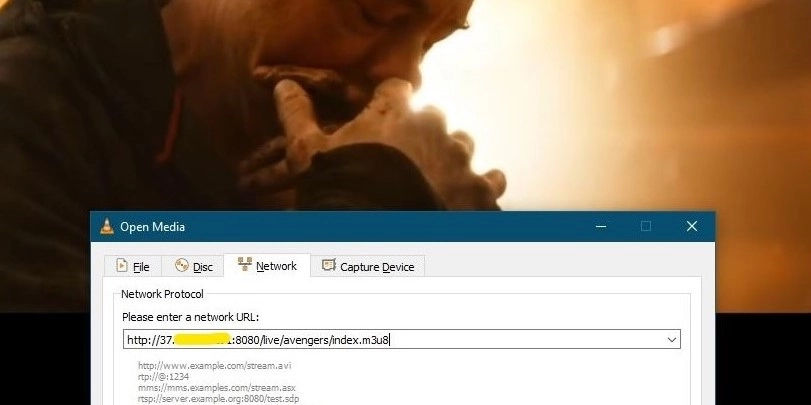
Start streaming, then open VLC on another machine, go to Media, then Open Network Stream, and enter http://<your-server-ip>:8080/live/avengers/index.m3u8:
If the video plays, your single-bitrate pipeline works end to end. Now make it adaptive.
Step 9: Add Adaptive Bitrate Transcoding
Install FFmpeg, which does the actual re-encoding:
sudo apt install ffmpeg
Edit the configuration and replace the entire rtmp block with this two-application version:
sudo nano /etc/nginx/nginx.conf
rtmp {
    server {
        listen 1935;
        chunk_size 4096;
        max_message 1M;

        application streaming {
            live on;

            exec ffmpeg -i rtmp://localhost/streaming/$name
              -c:a aac -b:a 32k  -c:v libx264 -b:v 128K -f flv rtmp://localhost/hls/$name_low
              -c:a aac -b:a 64k  -c:v libx264 -b:v 256k -f flv rtmp://localhost/hls/$name_mid
              -c:a aac -b:a 128k -c:v libx264 -b:v 512K -f flv rtmp://localhost/hls/$name_hi;
        }

        application hls {
            live on;
            hls on;
            hls_path /var/www/live;
            hls_nested on;

            hls_fragment 6s;
            hls_playlist_length 30s;

            hls_variant _low BANDWIDTH=160000;
            hls_variant _mid BANDWIDTH=320000;
            hls_variant _hi  BANDWIDTH=640000;
        }
    }
}
What changed:
application streamingno longer produces HLS itself. Instead, theexecdirective launches FFmpeg whenever a stream starts, reading the incoming feed and producing three renditions (one FFmpeg process, three outputs) pushed back into the localhlsapplication.$nameis the stream key, so every stream is transcoded automatically.application hlspackages each rendition (avengers_low,avengers_mid,avengers_hi) as HLS, and thehls_variantlines generate a master playlistavengers.m3u8listing all three with theirBANDWIDTHvalues. Players read the master playlist, start on a rendition that fits their bandwidth, and switch as conditions change.
The bitrates above are deliberately conservative for demonstration. For a real 720p/1080p service you would use something like 800k/1500k/3000k video bitrates and add -s scaling per rendition (e.g. -s 640x360 on the low variant) so lower bitrates also carry lower resolutions. Add or remove variants freely, just keep each hls_variant suffix matched to an FFmpeg output.
Validate and reload:
sudo nginx -t
sudo systemctl reload nginx
Step 10: Test the Adaptive Stream
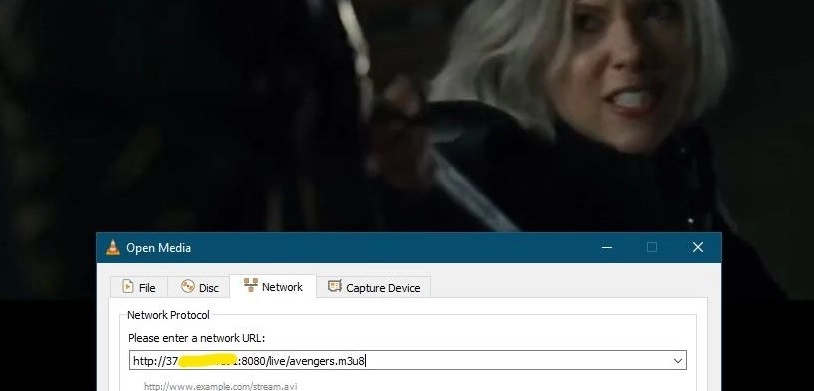
Stream from OBS exactly as before, but this time point VLC at the master playlist. Note the URL has no /index.m3u8, just the stream key:
http://<your-server-ip>:8080/live/avengers.m3u8
VLC picks a variant and plays. To convince yourself all three renditions exist, check the output directory: ls /var/www/live shows avengers_low, avengers_mid, and avengers_hi folders each filling with .ts segments, plus the avengers.m3u8 master playlist.
Common Problems and Troubleshooting
OBS connects, but no HLS files appear.
Check the FFmpeg transcode actually started: ps aux | grep ffmpeg while streaming. If there is no FFmpeg process, the exec failed. The most common causes are FFmpeg not installed or not in the PATH Nginx sees (use the absolute path exec /usr/bin/ffmpeg ... to rule that out). Errors from exec land in /var/log/nginx/error.log.
HLS files appear, then playback stutters or the renditions lag behind.
The server cannot transcode in real time. Watch CPU usage while streaming. Fixes, in order: reduce the number of variants, lower the encoding preset (-preset veryfast after each -c:v libx264), lower the source feed’s resolution, or move to a bigger machine.
Permission denied writing segments.
The worker runs as www-data (per the user directive), so the hls_path directory must be writable by that user. That is what the chown in Step 5 was for.
Stream plays in VLC but not in a browser player.
Browsers need CORS headers for HLS (the Access-Control-Allow-Origin header in the config) and, unlike VLC, will not play HLS natively except in Safari. Use a JavaScript player like hls.js or Video.js.
Viewers far from the server buffer even on good connections.
The problem is distance, not bandwidth. Put cache nodes near the viewers. HLS is just files over HTTP, which caches beautifully: How To Configure NGINX as CDN.
Best Practices
Scale resolution together with bitrate. A 128k stream at source resolution looks worse than a 128k stream at 360p. Give each rendition an -s WxH that matches its bitrate budget.
Keep the ingest application private. Anyone who can reach port 1935 and guess a stream key can broadcast on your server. Restrict ingest with a firewall rule to your encoder’s IP, or use the module’s on_publish callback to validate stream keys against your backend.
Serve playback through a real front door. Port 8080 with plain HTTP is fine for testing; production playback should go through port 443 with TLS (Secure Nginx with Let’s Encrypt SSL Using Certbot on Ubuntu) and, at scale, through CDN cache nodes rather than the origin.
Watch the transcode, not just the stream. The FFmpeg process is the fragile part of this pipeline. If you run this in production, alert on its absence: no ffmpeg process while a publisher is connected means viewers are getting nothing.
Conclusion
You built a live adaptive bitrate streaming server: Nginx ingests RTMP, FFmpeg fans the feed out into three bitrate renditions, and the RTMP module packages them into HLS with a master playlist that lets every viewer’s player pick the right quality in real time.
Natural next steps: the VoD version of this pipeline for pre-recorded content in How to Build an Adaptive Bitrate VoD Server with Nginx VOD Module, storing your media in object storage with Nginx VoD Server with MinIO, and distributing playback globally with How To Configure NGINX as CDN.