Your video plays at 720p for viewers on a fast connection, but viewers on a slower network spend half their time staring at a spinner. A single-resolution MP4 served over HTTP cannot adapt, everyone gets the same file regardless of what their connection can actually sustain.
Adaptive bitrate streaming fixes this. Instead of one file, the player receives a playlist of the same content encoded at multiple bitrates. It measures available bandwidth in real time and switches renditions automatically, keeping playback smooth regardless of network conditions.
This guide walks you through building a working Video-on-Demand (VoD) server on Ubuntu 24.04 LTS. You will compile Nginx from source with the Kaltura nginx-vod-module, use FFmpeg to produce 720p and 360p renditions from a single source file, and configure HLS adaptive streaming. By the end you will have a server you can test in VLC and point real players at.
How Adaptive Bitrate Streaming Works
Before writing any commands, it helps to understand the mechanism.
HLS (HTTP Live Streaming) splits a video into short segments, typically 2–6 seconds each, and generates a text-based playlist in .m3u8 format. A media player downloads the playlist, fetches segments in sequence, and plays them back continuously.
ABR (Adaptive Bitrate) adds a master playlist on top. The master playlist does not contain segments, it lists multiple variant playlists, one per bitrate rendition. The player monitors download speed: if segments arrive quickly, it switches to the higher-quality variant; if they arrive slowly, it steps down. Switching happens between segments, so the viewer sees no interruption.
The Kaltura nginx-vod-module implements this inside Nginx. Rather than pre-generating thousands of .ts segment files, it generates HLS segments on-the-fly from your original .mp4 files in response to each player request. In mapped mode, a JSON file maps each logical video identifier to the actual MP4 renditions on disk, this is how you tell the module which files are the 720p and 360p versions of a given title.
Prerequisites
- Ubuntu 24.04 LTS (Ubuntu 22.04 is also supported)
- A user with
sudoprivileges - At least 2 GB of RAM for the Nginx compile
- A source video file to serve
Step 1: Gain Privileged Access
The steps below require root permissions. Rather than running sudo su to open a permanent root shell (which means every mistake runs as root), prefix individual commands with sudo, or open an explicit root session that you close when done:
sudo -i
If you prefer sudo per-command, prepend it to each command that follows. The rest of this guide shows commands without a prefix for readability, add sudo where needed if you are not in a root session.
Step 2: Install Build Dependencies
Install the tools and libraries needed to compile Nginx and the VoD module:
apt update && apt install -y build-essential git libpcre2-dev libssl-dev zlib1g-dev libxml2-dev ffmpeg
What each package does:
build-essentialis the GCC compiler andmakelibpcre2-devis the PCRE2 regular expression library used by Nginx’s location matchinglibssl-devis the OpenSSL library for the SSL modulezlib1g-devis for gzip compressionlibxml2-devis the XML parsing library required by the VoD moduleffmpegis the video encoder used in the next step to produce multi-bitrate renditions
Step 3: Download the Nginx Source Code
Download the current stable release (1.30.1):
wget https://nginx.org/download/nginx-1.30.1.tar.gz
tar -zxvf nginx-1.30.1.tar.gz
You will have a folder named nginx-1.30.1. If a newer stable version has been released since this guide was written, check https://nginx.org/en/download.html and substitute the version number throughout.
Step 4: Download the Kaltura VoD Module
Download the current release of the nginx-vod-module (1.33):
wget https://github.com/kaltura/nginx-vod-module/archive/refs/tags/1.33.tar.gz
tar -zxvf 1.33.tar.gz
You will have a folder named nginx-vod-module-1.33. Confirm it is in the same directory as the nginx-1.30.1 folder before continuing.
Step 5: Build and Install Nginx
Move into the Nginx source directory:
cd nginx-1.30.1
Configure the build with the VoD module and the modules you need for a production server:
./configure \
    --prefix=/etc/nginx \
    --conf-path=/etc/nginx/nginx.conf \
    --error-log-path=/var/log/nginx/error.log \
    --http-log-path=/var/log/nginx/access.log \
    --pid-path=/run/nginx.pid \
    --sbin-path=/usr/sbin/nginx \
    --with-http_ssl_module \
    --with-http_v2_module \
    --with-http_stub_status_module \
    --with-http_realip_module \
    --with-file-aio \
    --with-threads \
    --with-stream \
    --with-cc-opt="-O3 -mpopcnt" \
    --add-module=../nginx-vod-module-1.33
ARM servers: The
-mpopcntflag is an x86-64 CPU instruction and will cause a build failure on ARM-based servers (AWS Graviton, Ampere Altra, Oracle Ampere). If you are on an ARM host, remove--with-cc-opt="-O3 -mpopcnt"entirely or replace it with--with-cc-opt="-O3".
Compile and install:
make && make install
Verify the build succeeded and that the VoD module is present:
nginx -V
The output should include --add-module=../nginx-vod-module-1.33.
Step 6: Create Multi-Bitrate Video Renditions with FFmpeg
This is the step that makes the server genuinely adaptive. The VoD module can serve different renditions to different viewers, but you have to provide the rendition files.
Assuming you have a source file called source.mp4, encode two renditions with consistent keyframe intervals. Consistent keyframe alignment is critical for smooth bitrate switching, if the keyframe positions differ between renditions, the player cannot switch cleanly at segment boundaries:
# 720p high-quality rendition
ffmpeg -i source.mp4 \
  -c:v libx264 -b:v 3000k -s 1280x720 \
  -g 48 -sc_threshold 0 \
  -c:a aac -b:a 128k \
  /etc/nginx/vod/transformers_720p.mp4

# 360p low-bandwidth rendition
ffmpeg -i source.mp4 \
  -c:v libx264 -b:v 800k -s 640x360 \
  -g 48 -sc_threshold 0 \
  -c:a aac -b:a 96k \
  /etc/nginx/vod/transformers_360p.mp4
The -g 48 flag sets the GOP (Group of Pictures) size, at 24 fps, this places a keyframe every 2 seconds, matching the default HLS segment duration. -sc_threshold 0 disables scene-change detection so the encoder does not insert extra keyframes at scene cuts; both renditions stay in sync.
Create the destination folder first:
mkdir -p /etc/nginx/vod
Step 7: Configure the VoD Server
Move to the Nginx config directory and back up the default config:
cd /etc/nginx
mv nginx.conf nginx.conf.old
Create a new config:
nano nginx.conf
Paste the following:
user www-data;
worker_processes auto;
worker_rlimit_nofile 8192;
pid /run/nginx.pid;

events {
    worker_connections 4096;
}

http {
    include       /etc/nginx/mime.types;
    default_type  application/octet-stream;

    server {
        listen 80;

        # vod mode
        vod_mode mapped;
        vod_upstream_location /mapping;

        # vod caches
        vod_metadata_cache metadata_cache 512m;
        vod_response_cache response_cache 128m;
        vod_mapping_cache mapping_cache 5m;

        # gzip manifests
        gzip on;
        gzip_types application/vnd.apple.mpegurl;

        # file handle caching
        open_file_cache          max=1000 inactive=5m;
        open_file_cache_valid    2m;
        open_file_cache_min_uses 1;
        open_file_cache_errors   on;

        # HLS streaming endpoint
        location /video/ {
            vod hls;

            add_header Access-Control-Allow-Headers '*';
            add_header Access-Control-Expose-Headers 'Server,range,Content-Length,Content-Range';
            add_header Access-Control-Allow-Methods 'GET, HEAD, OPTIONS';
            add_header Access-Control-Allow-Origin '*';
            expires 100d;
        }

        # Internal location serves JSON mapping files for vod_mode mapped
        location /mapping/ {
            internal;
            alias /etc/nginx/json/;
            try_files $uri $uri.json =404;
        }
    }
}
How this works: a player requests http://192.0.2.1/video/transformers/master.m3u8. The /video/ location matches and the vod hls directive handles it. In vod_mode mapped, the module makes an internal HTTP sub-request to /mapping/transformers to retrieve the JSON mapping file. The /mapping/ location is marked internal so it cannot be accessed directly from outside. The try_files line finds transformers.json on disk even though the sub-request URI has no extension.
Create the JSON Mapping File
Create the folder for mapping files:
mkdir -p /etc/nginx/json
Create a mapping file for the transformers video:
nano /etc/nginx/json/transformers.json
Paste this JSON:
{
    "sequences": [
        {
            "clips": [
                {
                    "type": "source",
                    "path": "/etc/nginx/vod/transformers_720p.mp4"
                }
            ]
        },
        {
            "clips": [
                {
                    "type": "source",
                    "path": "/etc/nginx/vod/transformers_360p.mp4"
                }
            ]
        }
    ]
}
Each object in sequences is one rendition. The VoD module reads this file, discovers the two MP4 paths, and generates a master HLS playlist that lists both variants. The player picks the right one based on available bandwidth. To add a 1080p rendition, add a third object under sequences.
Verify the Directory Layout
Your file structure should look like this:
/etc/nginx/
       ├── nginx.conf
       ├── json/
       │    └── transformers.json
       └── vod/
            ├── transformers_720p.mp4
            └── transformers_360p.mp4
Test the configuration before starting Nginx:
nginx -t
Expected output:
nginx: the configuration file /etc/nginx/nginx.conf syntax is ok
nginx: configuration file /etc/nginx/nginx.conf test is successful
Step 8: Create the Systemd Service
Build a systemd unit file so Nginx starts automatically at boot and can be managed with systemctl:
nano /lib/systemd/system/nginx.service
Paste this:
[Unit]
Description=Nginx VoD Server
After=syslog.target network-online.target remote-fs.target nss-lookup.target
Wants=network-online.target

[Service]
Type=forking
PIDFile=/run/nginx.pid
ExecStartPre=/usr/sbin/nginx -t
ExecStart=/usr/sbin/nginx
ExecReload=/usr/sbin/nginx -s reload
ExecStop=/bin/kill -s QUIT $MAINPID
PrivateTmp=true

[Install]
WantedBy=multi-user.target
Reload systemd and enable the service:
systemctl daemon-reload
systemctl enable nginx
systemctl start nginx
Check that Nginx is running:
systemctl status nginx
Step 9: Test the VoD Server
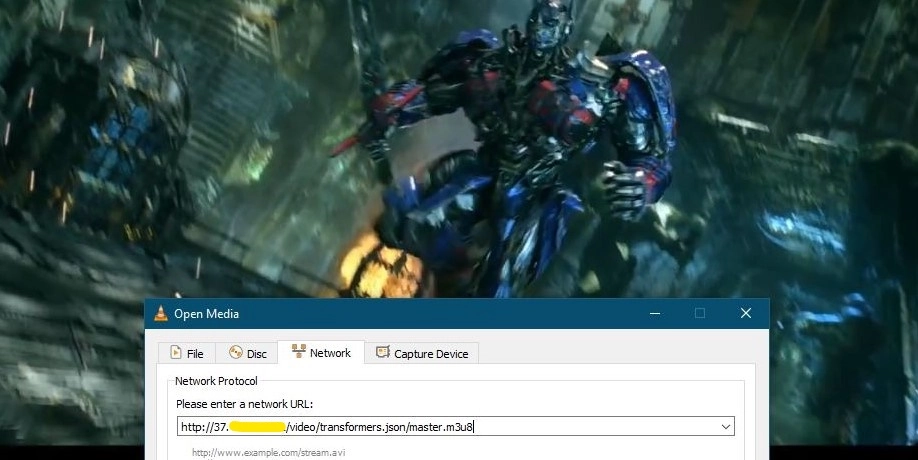
Open VLC on your laptop. Go to Media → Open Network Stream and enter:
http://<your-server-ip>/video/transformers/master.m3u8
VLC will download the master playlist, discover the 720p and 360p variants, and start playing. If your test connection is fast, it will stay on 720p; throttle your connection or test from a mobile device on a weak signal to see it step down.
Add HTTPS
The configuration above listens on port 80. Modern browsers and media players increasingly block HTTP video behind HTTPS pages (mixed-content policy), and some CDNs require TLS for origin connections. Running a production VoD server over plain HTTP is not recommended.
To add HTTPS, obtain a certificate with Certbot (Let’s Encrypt) and update your Nginx listener to use port 443. The full process is covered step-by-step in How to Secure Nginx with Let’s Encrypt SSL Using Certbot on Ubuntu, follow that guide, then update your server block to reference the issued certificate files.
Common Mistakes and Troubleshooting
Build fails with illegal instruction or invalid argument '-mpopcnt'
You are on an ARM server. Remove --with-cc-opt="-O3 -mpopcnt" from the configure line and rebuild.
Build fails with pcre2.h: No such file or directory
Install the missing header: apt install libpcre2-dev. If that package is unavailable on a very old system, fall back to libpcre3-dev.
nginx -t fails with unknown directive vod_mode
The VoD module was not compiled in. Run nginx -V and confirm nginx-vod-module appears in the output. If it does not, re-run ./configure with the correct --add-module= path and rebuild.
Port 80 is already in use - Nginx fails to start
Check what is holding port 80: ss -tlnp | grep :80. Kill or disable that service before starting Nginx.
Video plays but never switches quality
The most common cause is renditions encoded with different GOP sizes or inconsistent keyframe positions. Re-encode both files using identical -g and -sc_threshold 0 values as shown in Step 6. The player can only switch at segment boundaries, and segment boundaries are defined by keyframe positions.
CORS errors in browser-based players
The config above sets Access-Control-Allow-Origin '*'. If this is not taking effect, check that Nginx is actually the server responding and that no upstream proxy is stripping the headers. For players running on HTTPS pages, the video endpoint must also be HTTPS (see the section above).
nginx: [error] open() "/etc/nginx/json/transformers.json" failed (13: Permission denied)
The user www-data; directive requires the JSON and VOD files to be readable by the www-data user:
chown -R www-data:www-data /etc/nginx/json /etc/nginx/vod
chmod -R 755 /etc/nginx/json /etc/nginx/vod
Best Practices
Run Nginx as www-data. The user www-data; directive in nginx.conf already handles this. Never run a production Nginx as root.
Serve over HTTPS. See the HTTPS section above. Without TLS, your streams can be intercepted and browser-based players will refuse to load your video on HTTPS pages.
Set up log rotation. Nginx logs will grow indefinitely without rotation. Create a logrotate config:
nano /etc/logrotate.d/nginx
/var/log/nginx/*.log {
    daily
    missingok
    rotate 7
    compress
    delaycompress
    notifempty
    create 0640 www-data adm
    sharedscripts
    postrotate
        /usr/sbin/nginx -s reopen
    endscript
}
Cache strategically. The three vod_*_cache directives in the config above cache parsed metadata, generated responses, and mapping JSON lookups. The defaults shown are reasonable for a single-server deployment; increase them if you have more RAM and a large video library.
Keep Nginx and the module updated together. The VoD module is compiled into Nginx at build time. When a new Nginx stable release ships or the module releases a security fix, you need to recompile, download both tarballs and repeat Steps 3–5. Your config and video files are unaffected.
Conclusion
You now have a working adaptive bitrate VoD server on Ubuntu 24.04. Nginx serves HLS playlists and segments on-the-fly from a pair of MP4 renditions, and the player switches bitrate automatically based on the viewer’s available bandwidth.
From here, good next steps is to Make the VoD server stateless by storing video files in object storage instead of the local filesystem, see Nginx VoD Server Configuration: Minio Integration