Sometimes you want to set up a mini version of Kubernetes because of some concern. This tutorial will show you how to install k3s that are resilient, performant, and scalable With Calico and External MySQL Database. This time we will install 1 node k3s, but later you can scale this cluster to multi-server & agent with ease.
Prerequisite
- Ubuntu 18.04 or later
Sudo Privileges
Before starting, we make sure that we will have no permission issues on the installation and configuration.
sudo su
Prepare MySQL
First, install the MySQL database on your server using this command
apt update && apt install mysql-server
Make sure the service is running
service mysql status
The CLI response should be active (running) like this:
root@ngoprek:/home/bagus# service mysql status
● mysql.service - MySQL Community Server
     Loaded: loaded (/lib/systemd/system/mysql.service; enabled; vendor preset: enabled)
     Active: active (running) since Thu 2023-11-02 23:38:16 UTC; 25s ago
   Main PID: 38293 (mysqld)
     Status: "Server is operational"
      Tasks: 38 (limit: 2292)
     Memory: 365.7M
     CGroup: /system.slice/mysql.service
             └─38293 /usr/sbin/mysqld

Nov 02 23:38:11 ngoprek systemd[1]: Starting MySQL Community Server...
Nov 02 23:38:16 ngoprek systemd[1]: Started MySQL Community Server.
If the MySQL is still not running, start the service
service mysql start
Also, enable the service so that MySQL will automatically be started when the VM is booting
systemctl enable mysql
Run this script to configure MySQL
mysql_secure_installation
and then configure them according to your needs.
After that, go to your MySQL server using this command
mysql
Create a database for k3s, you can change the database name according to your need
CREATE DATABASE k3s_database;
Create a user for k3s, and change the user & password in this script according to your need
CREATE USER 'k3s_user'@'%' IDENTIFIED BY 'K3S123';
Grant access to the user you created
GRANT ALL PRIVILEGES ON k3s_database.* TO 'k3s_user'@'%';
Flush privileges and exit MySQL
FLUSH PRIVILEGES;
exit
Prepare Host
To make our cluster more flexible, we will use a domain name instead of an IP for several configurations when installing k3s. We will use:
k3s_endpointfor Cluster’s Fix Registration Addressmysql_endpointfor MySQL Endpoint
And of course, you can change the domain name according to your needs.
To do this, let’s go to /etc/hosts file, and then add this line
127.0.0.1 k3s_endpoint mysql_endpoint
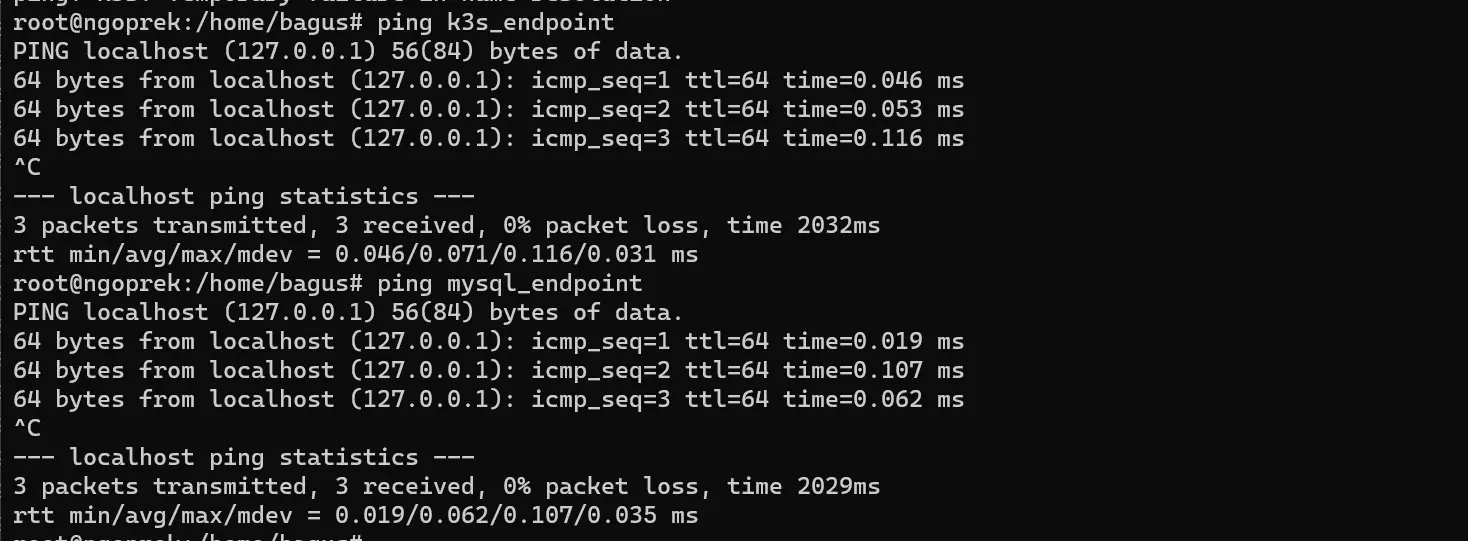
Next, make sure that the name is directed to a valid IP when you ping them:

Install k3s with Calico Network & MySQL Database
Install single node k3s using this script, but before you execute this script, make sure that your host network is a different segment with the --cluster-cidr config below. If your host network already using 192.168.0.0/16, then you can use 10.0.0.0/16 as cluster CIDR.
curl -sfL https://get.k3s.io | K3S_TOKEN="K3SC11T" K3S_KUBECONFIG_MODE="644" INSTALL_K3S_EXEC="--cluster-init --tls-san=k3s_endpoint --datastore-endpoint=mysql://k3s_user:K3S123@tcp(mysql_endpoint:3306)/k3s_database --flannel-backend=none --cluster-cidr=192.168.0.0/16 --disable-network-policy --disable=traefik" sh -
Note that you must change that marked text according to your needs and your configuration. Save the K3S_TOKEN because it will be used when you want to join another node to this cluster later.
Next, install the calico operator
kubectl create -f https://raw.githubusercontent.com/projectcalico/calico/v3.26.3/manifests/tigera-operator.yaml
Then, download the calico manifest
wget https://raw.githubusercontent.com/projectcalico/calico/v3.26.3/manifests/custom-resources.yaml
Before installing, open the custom-resources.yaml and make sure the spec.calicoNetwork.ipPools[0].cidr is the same as --cluster-cidr when you install the k3s. Open the file custom-resources.yaml using nano to take a look:
nano custom-resources.yaml
Note that you must change the marked text according to your need:
kind: Installation
metadata:
  name: default
spec:
  # Configures Calico networking.
  calicoNetwork:
    # Note: The ipPools section cannot be modified post-install.
    ipPools:
    - blockSize: 26
      cidr: 192.168.0.0/16
      encapsulation: VXLANCrossSubnet
      natOutgoing: Enabled
      nodeSelector: all()

---
kind: APIServer
metadata:
  name: default
spec: {}
After that, run this command to install Calico
kubectl create -f custom-resources.yaml
Now you can monitor and wait several minutes until all of the pods inside k3s are in Running status using this command
kubectl get pod --all-namespaces
If all the pods are ready, you will see 10 pods in Running status
NAMESPACE         NAME                                      READY   STATUS    RESTARTS   AGE
kube-system        local-path-provisioner-957fdf8bc-55vxn     1/1     Running   0               50m
calico-system      csi-node-driver-2xffc                      2/2     Running   0               30m
kube-system        coredns-77ccd57875-c2n2f                   1/1     Running   0               50m
calico-system      calico-kube-controllers-7bd8484dd4-zq7sm   1/1     Running   0               30m
calico-system      calico-typha-dcf8745f6-prrnm               1/1     Running   0               30m
tigera-operator    tigera-operator-f6bb878c4-w4k7b            1/1     Running   1 (4m54s ago)   31m
calico-apiserver   calico-apiserver-79fd794858-7fj65          1/1     Running   0               23m
calico-apiserver   calico-apiserver-79fd794858-j8p2x          1/1     Running   0               23m
kube-system        metrics-server-648b5df564-rsdts            1/1     Running   0               50m
calico-system      calico-node-25scz                          1/1     Running   0               30m
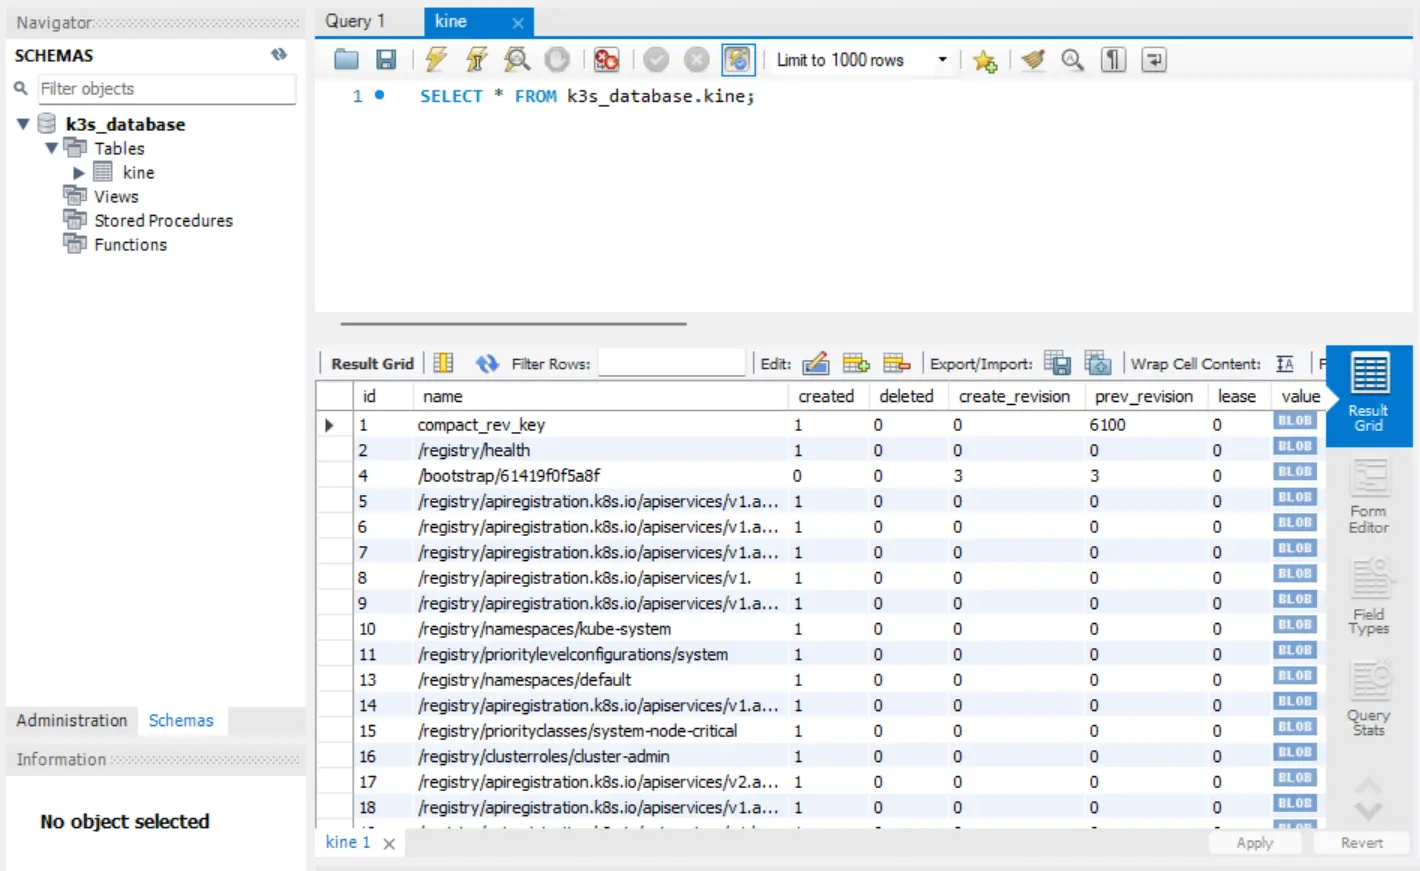
You can also see in your MySQL there will be a new table inside the database called kine

Done! Now your k3s cluster is ready.