Kubernetes does not ship with an image registry. The moment you build your own container images, you need somewhere to store them, and your two options are to push them to a public registry like Docker Hub or to run a private registry of your own. For anything proprietary, internal, or rate-limit sensitive, a private registry is the right call: your images stay under your control, pulls are fast and local, and you are not exposed to Docker Hub’s anonymous pull limits.
Harbor is the standard answer. It is a CNCF graduated project, an open-source container registry that adds the things a bare registry lacks: a web dashboard, projects with per-project access control, vulnerability scanning, image signing, and replication. In this tutorial you will install Harbor on an Ubuntu server, secure it with TLS, create a project, and then push and pull images from a Kubernetes cluster.
This guide is for developers, sysadmins, and DevOps engineers who self-host Kubernetes and want a private registry they fully control. Although Harbor can run inside Kubernetes, I recommend installing it on a dedicated server outside the cluster. It keeps the registry available even when the cluster is being rebuilt, avoids a chicken-and-egg problem where the cluster needs the registry to start, and makes backups far simpler.
Conceptual Overview
Before the commands, let us get the moving parts straight.
A container registry is a server that stores and serves container images. When you run docker push or Kubernetes pulls an image, it is talking to a registry over HTTPS. Docker Hub is just a public, hosted registry; Harbor is one you run yourself.
Harbor is not a single program. It is a set of services, the registry, a database, a job service, a web portal, and a reverse proxy, that run together as containers. That is why we install it with Docker and Docker Compose: the official installer ships a docker-compose.yml that wires all of those services together for you.
Inside Harbor, images are organized into projects. A project is a namespace that owns a set of repositories and has its own membership and access rules; it can be public (anyone can pull) or private (credentials required). An image path therefore always has the shape registry-domain/project/image:tag, for example registry.facsiaginsa.com/superweb/custom-nginx:latest.
Finally, because Kubernetes pulls images over TLS and authenticates against private projects, you will hand the cluster the registry credentials through a Secret of type docker-registry, then reference that Secret from your pods with imagePullSecrets.
Prerequisites
Before starting, make sure you have:
- An Ubuntu server (20.04, 22.04, or 24.04) with at least 2 CPUs, 4 GB RAM, and 40 GB of disk. Image storage grows quickly, so err on the side of more disk.
- Root privileges. Every command below assumes you are root. Run
sudo suonce at the start so you do not hit permission errors mid-install. - A domain name pointing at the server’s IP, for example
registry.facsiaginsa.com. Confirm DNS resolves withdig +short registry.facsiaginsa.com. - A TLS certificate and private key for that domain. A real, browser-trusted certificate is strongly recommended. If you already issue certificates with Let’s Encrypt elsewhere, the same approach in my cert-manager and Let’s Encrypt guide covers the concepts; here you simply need the resulting
.crtand.keyfiles on the server.
Throughout this guide I will use the domain registry.facsiaginsa.com. Replace it with your own everywhere it appears.
Step 1: Install Docker Engine
First, refresh the package index and install the dependencies Docker’s repository needs:
apt update && apt install -y ca-certificates curl gnupg
Add Docker’s official GPG key:
install -m 0755 -d /etc/apt/keyrings
curl -fsSL https://download.docker.com/linux/ubuntu/gpg | gpg --dearmor -o /etc/apt/keyrings/docker.gpg
chmod a+r /etc/apt/keyrings/docker.gpg
Add the Docker repository for your Ubuntu release:
echo \
  "deb [arch=$(dpkg --print-architecture) signed-by=/etc/apt/keyrings/docker.gpg] https://download.docker.com/linux/ubuntu \
  $(. /etc/os-release && echo "$VERSION_CODENAME") stable" \
  | tee /etc/apt/sources.list.d/docker.list > /dev/null
Install the Docker Engine, CLI, containerd, and the Docker Compose plugin in one go. Modern Harbor uses Compose v2, which ships as this plugin rather than the old standalone docker-compose binary:
apt update && apt install -y docker-ce docker-ce-cli containerd.io docker-compose-plugin
Confirm both Docker and Compose are working:
docker run hello-world
docker compose version
If Docker is installed correctly, hello-world prints a confirmation message that begins with:
Hello from Docker!
This message shows that your installation appears to be working correctly.
And docker compose version should report v2.x or newer.
Step 2: Download the Harbor installer
Go to the Harbor releases page and find the latest stable version. At the time of writing that is v2.11.1, so I will use it below; substitute whatever the current release is.
Download the online installer (it pulls images at install time, keeping the archive small):
wget https://github.com/goharbor/harbor/releases/download/v2.11.1/harbor-online-installer-v2.11.1.tgz
Extract it and enter the directory:
tar xzvf harbor-online-installer-v2.11.1.tgz
cd harbor
Step 3: Configure Harbor
Harbor reads its settings from harbor.yml. The installer ships a template, so copy it and open it for editing:
cp harbor.yml.tmpl harbor.yml
nano harbor.yml
You only need to change a few parameters. Find each one and set it to match your environment.
hostname — the domain clients will use to reach the registry:
hostname: registry.facsiaginsa.com
https — upload your certificate and key to the server, then point Harbor at their exact paths. Here I keep both in /etc/ssl:
https:
  port: 443
  certificate: /etc/ssl/facsiaginsa.com.crt
  private_key: /etc/ssl/facsiaginsa.com.key
external_url — uncomment it and set it to the public HTTPS URL. When this is set, Harbor uses it for generated links and you can leave hostname as the internal address:
external_url: https://registry.facsiaginsa.com
harbor_admin_password — the initial password for the admin account. You do not have to change it here, but note whatever it is, because you will need it for the first login:
harbor_admin_password: Harbor12345
Save and exit (Ctrl+O, Enter, Ctrl+X in nano).
A note on security: never leave the default
Harbor12345password in place on a server reachable from the internet. We change it from the dashboard right after the first login.
Step 4: Run the installer
From inside the harbor directory, start the installation:
./install.sh
The script checks prerequisites, pulls all the required images, and brings the stack up with Docker Compose. After anywhere from a few seconds to a couple of minutes depending on your network, you should see:
✔ ----Harbor has been installed and started successfully.----
Verify the containers are up:
docker compose ps
Every service, nginx, harbor-core, harbor-db, registry, redis, and the rest, should show status Up or healthy.
Step 5: Log in and secure the admin account
Open your external_url in a browser, in my case https://registry.facsiaginsa.com. You will be greeted by the Harbor login page.
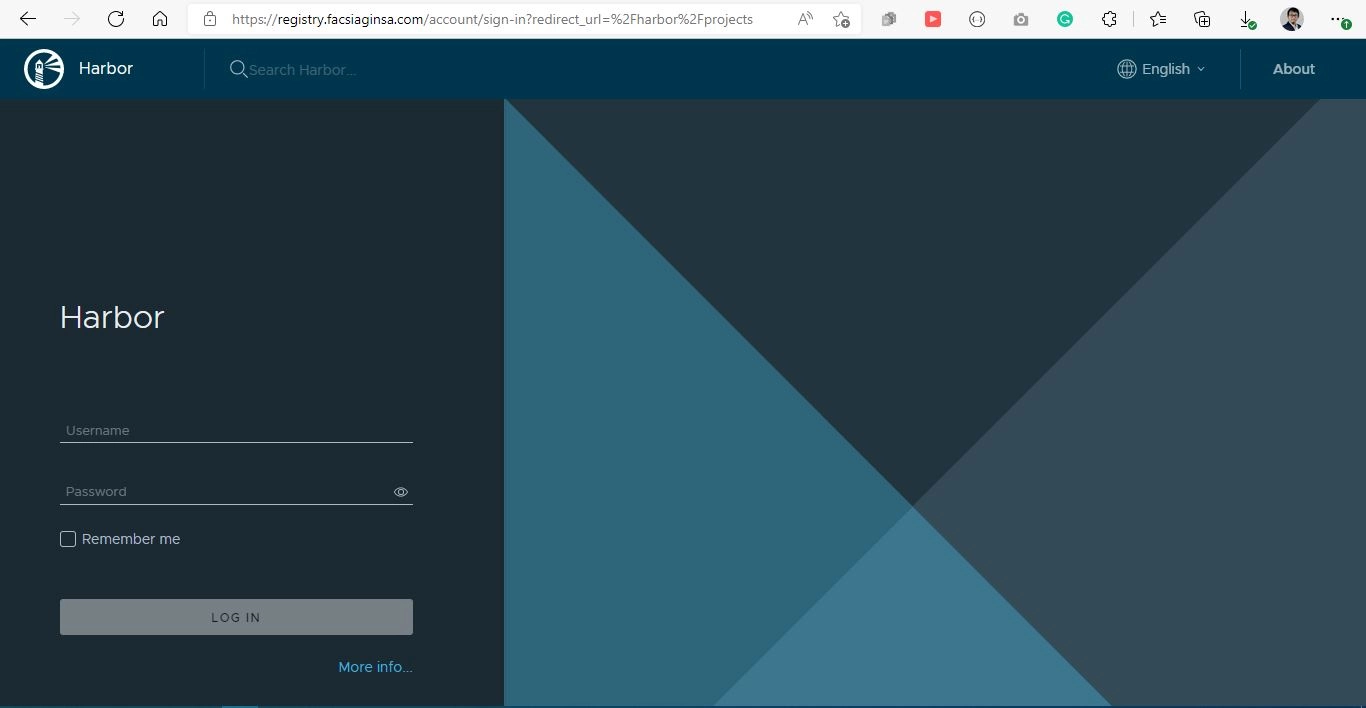
Log in with the username admin and the password you set in harbor_admin_password.
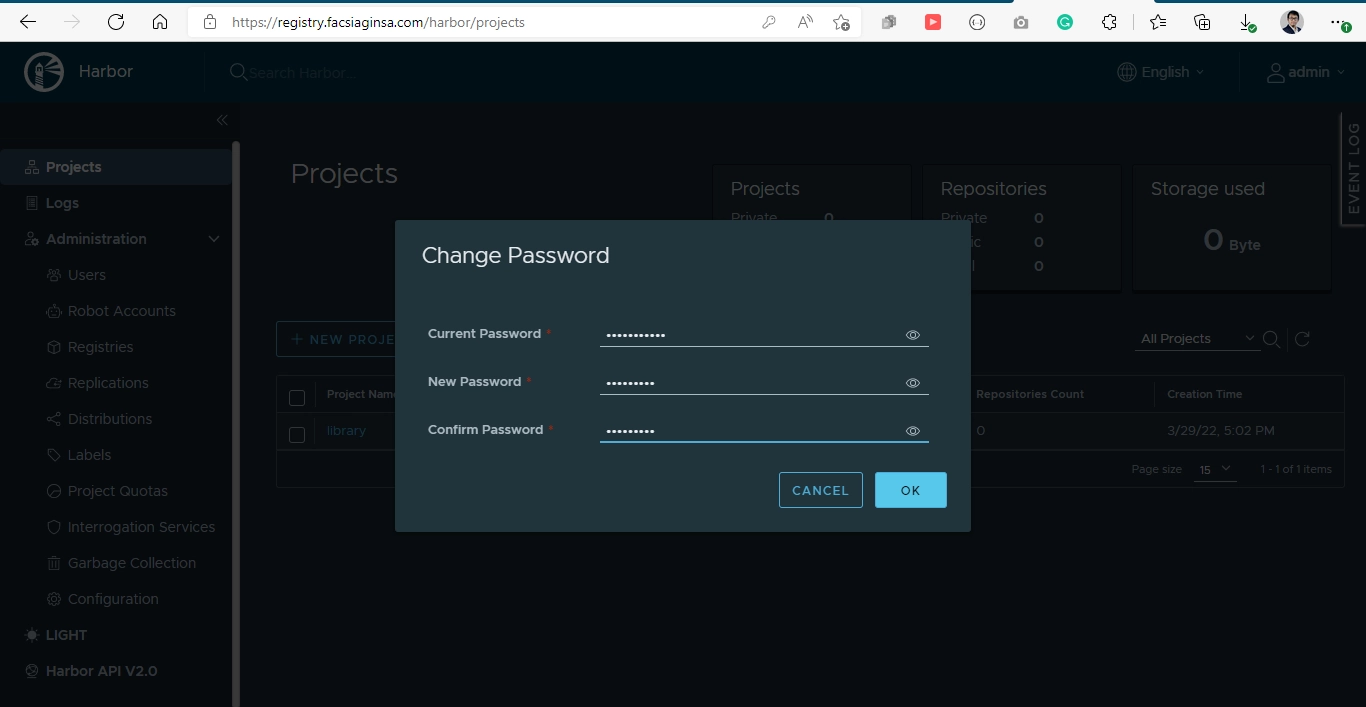
Security first: change that password immediately. Click the profile menu at the top right, then Change Password.
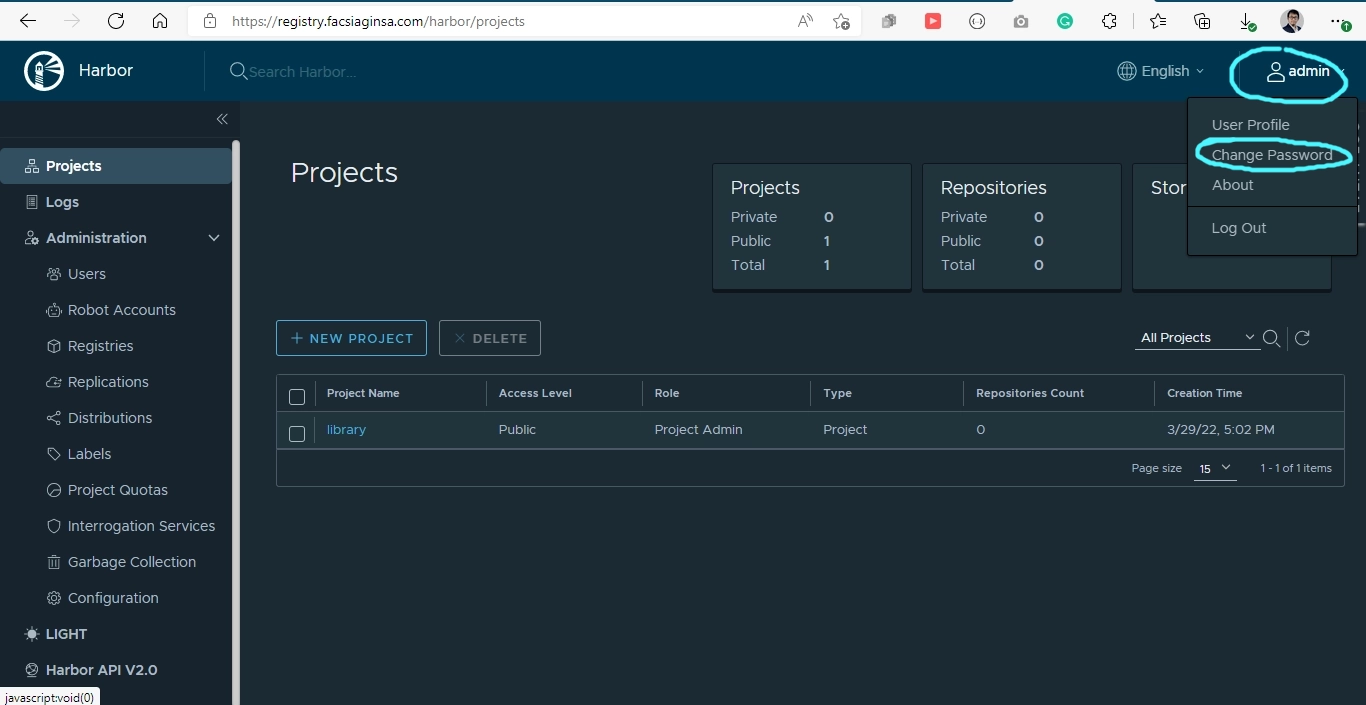
Enter a strong new password and save.
Step 6: Create a project
Images live inside projects, so create one before pushing anything. Open the Projects menu and click + NEW PROJECT.
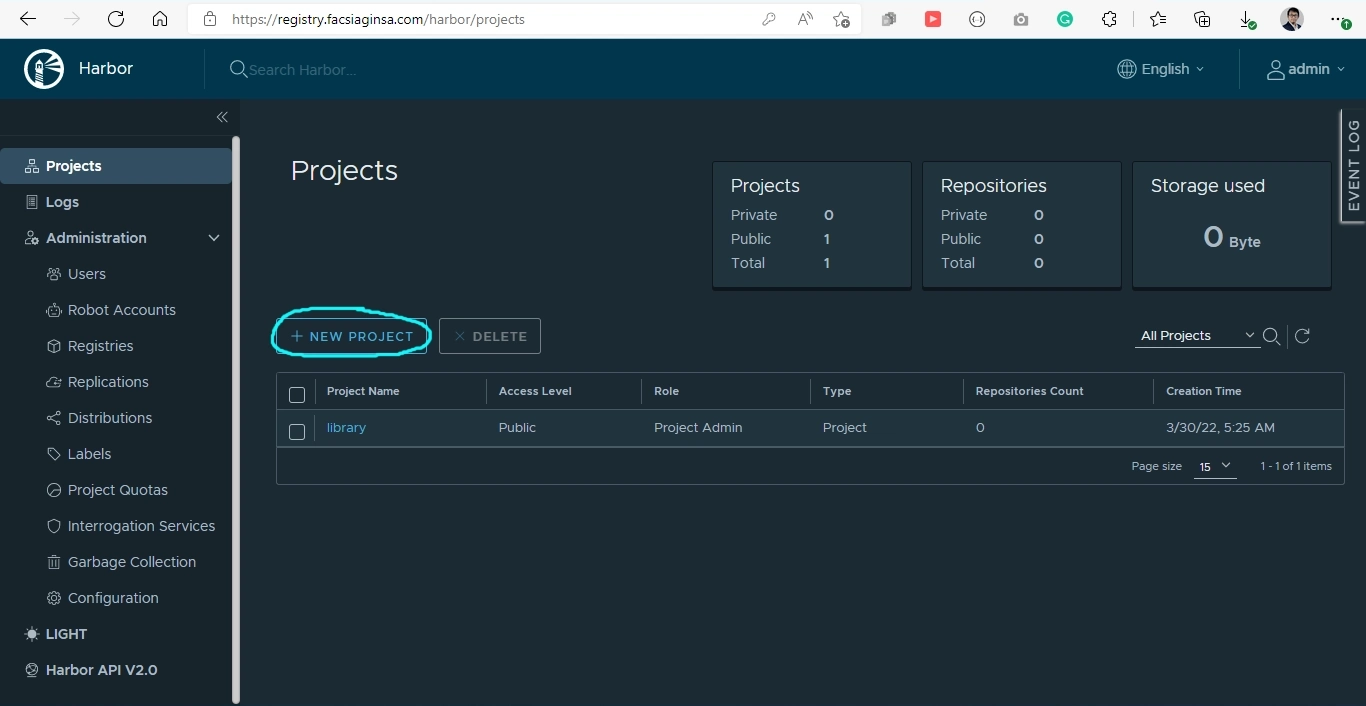
Give it a name, here I use superweb, choose whether it is public or private, and set a storage quota that fits your needs.
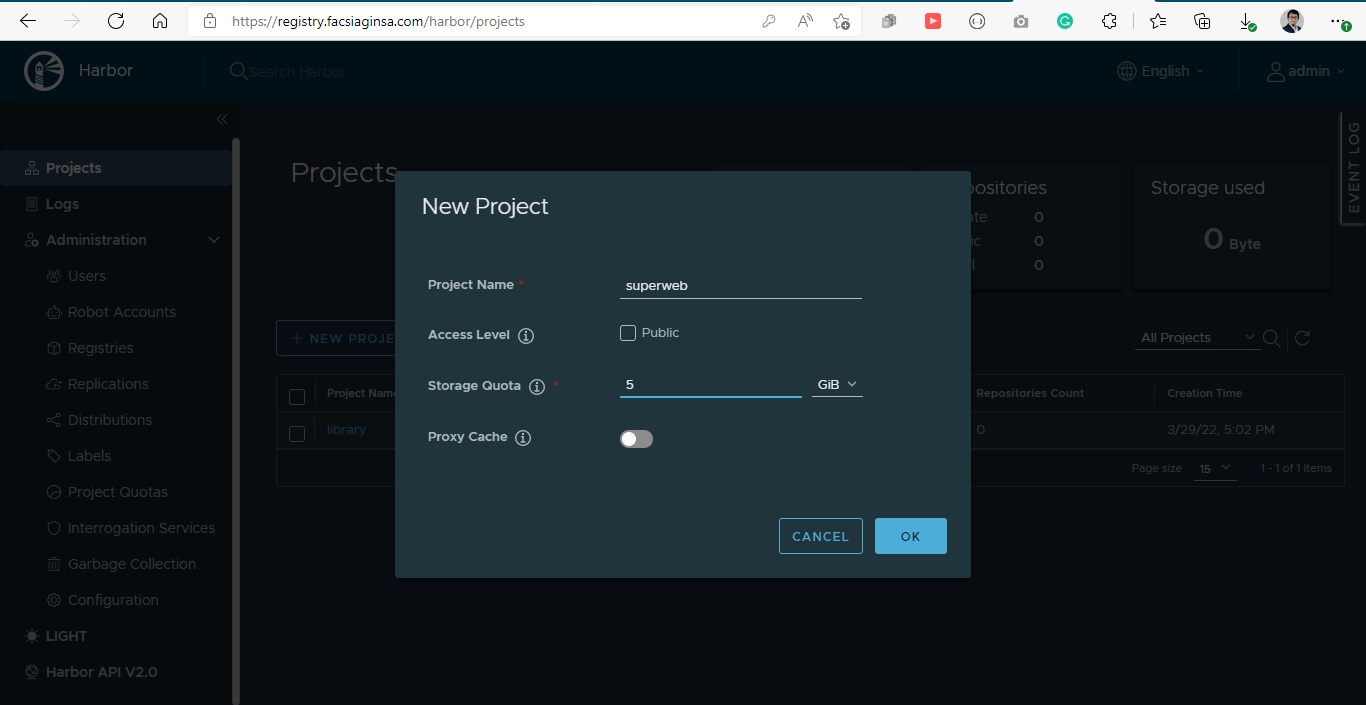
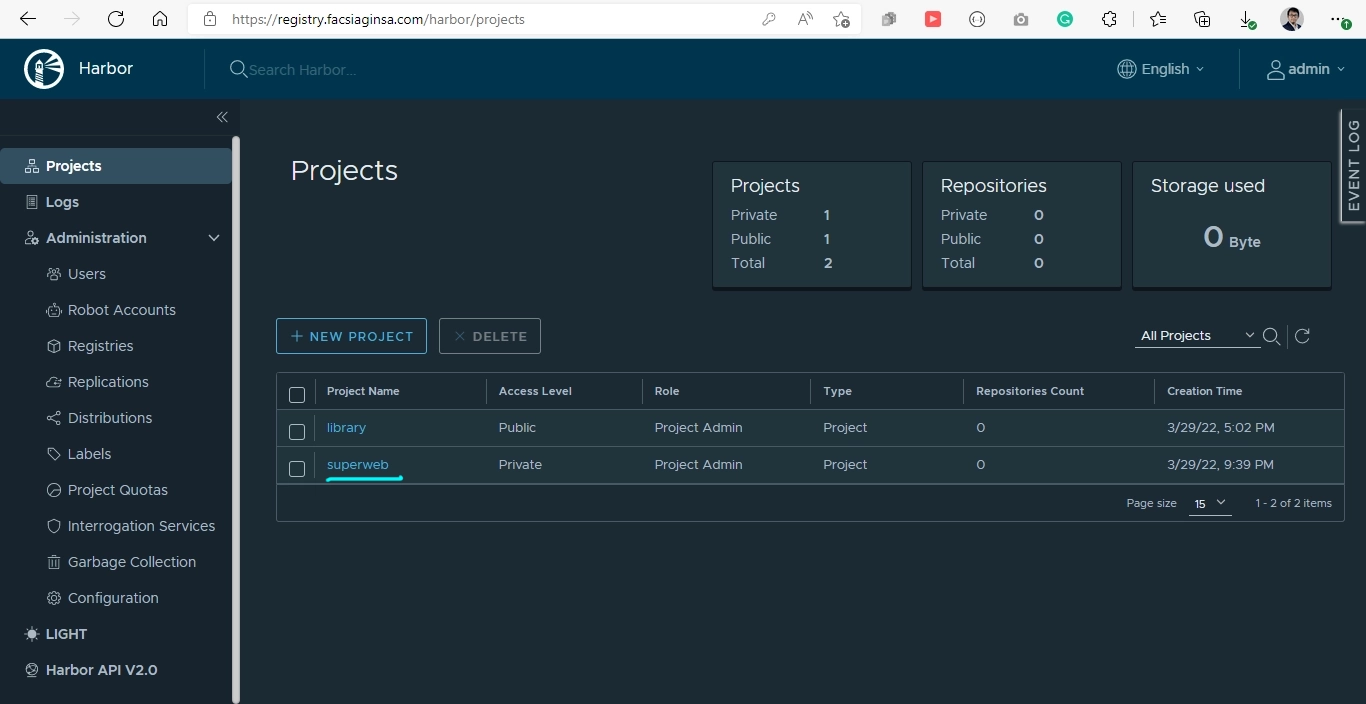
Click OK, and the project appears in the list.
Harbor is now ready to use as your private image registry. The rest of this guide shows the two operations you will do constantly: pushing an image to Harbor and pulling one from Kubernetes.
Step 7: Push an image to Harbor
From any machine with Docker, log in to your registry:
docker login registry.facsiaginsa.com
Use the same credentials as the dashboard. A successful login prints:
Login Succeeded
Tag your image using the registry’s required format, registry-domain/project/image:tag:
docker build -t registry.facsiaginsa.com/superweb/custom-nginx:latest .
Here registry.facsiaginsa.com is the registry domain, superweb is the project you created, and custom-nginx is the image name. Push it:
docker push registry.facsiaginsa.com/superweb/custom-nginx:latest
Refresh the project in the dashboard and the repository will be listed with its tag.
Step 8: Pull the image from Kubernetes
For a private project, Kubernetes must authenticate to Harbor. Create a docker-registry Secret holding the credentials. As a best practice, create a dedicated Harbor robot account for this rather than reusing admin:
kubectl create secret docker-registry myprivateregistry \
  --docker-server=registry.facsiaginsa.com \
  --docker-username=admin \
  --docker-password=XXXXXXXXX
Change myprivateregistry to whatever name you like, and set the server, username, and password to your own.
Then reference that Secret from your pod with imagePullSecrets:
apiVersion: v1
kind: Pod
metadata:
  name: mypod
spec:
  containers:
    - name: my-pod
      image: registry.facsiaginsa.com/superweb/custom-nginx:latest
  imagePullSecrets:
    - name: myprivateregistry
Apply it and Kubernetes will pull the image straight from your own registry. If the project is public, you can omit the Secret and imagePullSecrets entirely.
Common Mistakes and Troubleshooting
x509: certificate signed by unknown authority when pushing. Docker rejected the registry’s TLS certificate. If you used a real CA-issued certificate this should not happen; if you used a self-signed one, copy it into /etc/docker/certs.d/registry.facsiaginsa.com/ca.crt on every client and restart Docker.
install.sh fails on the prerequisite check. The installer needs both Docker and the Compose plugin. Re-run docker compose version; if it errors, the docker-compose-plugin package is missing from Step 1.
unauthorized: authentication required on pull. The pull Secret is wrong or absent. Confirm the Secret exists in the same namespace as the pod, the --docker-server exactly matches the registry hostname (no https:// prefix), and the credentials are valid.
denied: requested access to the resource is denied on push. The project name in your image tag does not exist, or your account is not a member of it. Check the spelling against the Projects page and your project membership.
The dashboard is unreachable after install. Confirm DNS points at the server, that ports 80 and 443 are open in the firewall, and that docker compose ps shows the nginx container healthy.
Best Practices
Run Harbor outside your Kubernetes cluster. A registry the cluster depends on should not live inside that same cluster. A dedicated host keeps pulls working during cluster maintenance and rebuilds.
Use robot accounts, not admin, for automation. Harbor lets you create per-project robot accounts with scoped permissions. Use them for CI pipelines and Kubernetes pull Secrets so you can rotate or revoke access without touching the admin password.
Enable the built-in vulnerability scanner. Harbor ships with Trivy. Turn on “scan on push” so every image is checked for known CVEs, and consider blocking deployment of images above a severity threshold.
Set storage quotas per project. Image layers accumulate fast. Per-project quotas plus a tag retention policy keep disk usage from quietly filling the server.
Back up the data and config. Harbor’s state lives in its database and the registry storage volume. Snapshot harbor.yml, the database, and the data directory regularly so you can rebuild after a failure.
Keep Harbor updated. It releases often and patches security issues. Review the release notes, then upgrade by downloading the new installer and re-running it against your existing harbor.yml.
Conclusion
You now have a fully functional private container registry. You installed Docker and the Compose plugin, configured Harbor with TLS and a real domain, brought the stack up, secured the admin account, created a project, and proved the whole pipeline by pushing an image and pulling it into Kubernetes with a docker-registry Secret.
From here, the natural next steps are to create robot accounts for your CI/CD pipelines, enable Trivy scanning on push, and add a tag retention policy. If you are wiring this into a self-hosted cluster, it pairs well with the rest of my bare-metal Kubernetes series, including automatic HTTPS with cert-manager for the TLS side of things. With Harbor in place, your images stay private, fast, and entirely under your control.