This tutorial is updated on April 2022, we will be installing the latest stable version of jitsi-meet here. For consistency, I will explicitly define the version number when installing the jitsi-meet library.
This tutorial is for jitsi-meet installation using 2 servers or more. The main server will contain jitsi-meet react source code, prosody, nginx, and jicofo. The videobridge will be installed separately on the jvb server.
After this installation guide you will get:
- Default jitsi meet website GUI
- Websocket enabled on prosody & videobridge
- Authentication (Secure Domain) enabled on Jicofo
Prerequisite
- Minimum 2 servers with 1 IP Public each. Let’s called them main server & jvb server.
- Ubuntu 20.04, this tutorial is updated and tested in Ubuntu 20.04, but it should also work in Ubuntu 18.04.
Sudo Privileges
Before starting, we will make sure that we have no permission issues with the installation and configuration.
sudo su
Install Jitsi Meet
Note: Do this step on the main server
On this server, we will install the nginx, prosody, and jicofo. We will disable the jitsi videobridge that is installed on this server.
Update the repository
apt update
Install dependencies library
apt install apt-transport-https make nginx && apt-add-repository universe
Note that we also need to install Nginx before installing jitsi-meet so the jitsi-meet does not use apache or jetty as the webserver.
First, install Nodejs. On the jitsi developer guide page, it is stated Node.js >= 16 and npm >= 8 are required.
curl -fsSL https://deb.nodesource.com/setup_16.x | sudo -E bash -
apt install nodejs
Make sure the installation is success by running this command
node -v && npm -v
Add prosody repository to package manager
echo deb http://packages.prosody.im/debian $(lsb_release -sc) main | sudo tee -a /etc/apt/sources.list
wget https://prosody.im/files/prosody-debian-packages.key -O- | sudo apt-key add -
Add jitsi repository to package manager
curl https://download.jitsi.org/jitsi-key.gpg.key | sudo sh -c 'gpg --dearmor > /usr/share/keyrings/jitsi-keyring.gpg'
echo 'deb [signed-by=/usr/share/keyrings/jitsi-keyring.gpg] https://download.jitsi.org stable/' | sudo tee /etc/apt/sources.list.d/jitsi-stable.list > /dev/null
Update your repository
apt update
Finally, install jitsi-meet, jicofo, prosody, and videobridge.
apt install jitsi-meet=2.0.7001-1 jitsi-meet-prosody=1.0.5913-1 jicofo=1.0-862-1 jitsi-videobridge2=2.1-634-gff8609ad-1
We said that we will not use videobridge on this server, but here, we still install it just to make it easier to find out the videobridge password. We will disable it later.
Tips!
This is the latest stable version as of April 2022. I define the jitsi-meet version to make the result more consistent, you are welcome to install the latest version by taking out the version.
apt install jitsi-meet
You will be asked about the domain and SSL option when installing jitsi-meet. For me, I prefer to use let’s encrypt and then change it later.
With this installation I got:
- jitsi-meet version
2.0.7001-1, - jitsi-meet-prosody version
1.0.5913-1, - jicofo version
1.0-862-1, - videobridge version
2.1-634-gff8609ad-1.
You can confirm the version by running this command
apt list jitsi-meet jitsi-meet-prosody jicofo jitsi-videobridge2 | grep installed
Downgrade Prosody
Note: Do this step on the main server
With the above installation, you will get prosody version 0.12.0 if you install it on Ubuntu 20.04. You can confirm this by using this command
prosodyctl about
At the time that this tutorial is made, it is said on the jitsi self-hosted guide that currently the prosody 0.12.0 version is not supported, hence we must downgrade our prosody to 0.11.x version. If you already got a 0.11.x version prosody, then you can skip this step.
Tips!
If the jitsi self-hosted guide page state that it is compatible with the prosody
0.12.0version, then you don’t have to do this step. Please check jitsi self-hosted guide page to see the update on this one.
Make sure there is a prosody-0.11 package on the package manager by running this command
apt list prosody-0.11
Install the 0.11.x version prosody
apt install prosody-0.11
You will be asked this question
Configuration file '/etc/prosody/prosody.cfg.lua'
 ==> Modified (by you or by a script) since installation.
 ==> Package distributor has shipped an updated version.
   What would you like to do about it ?  Your options are:
    Y or I  : install the package maintainer's version
    N or O  : keep your currently-installed version
      D     : show the differences between the versions
      Z     : start a shell to examine the situation
Choose to install the package maintainer’s version. Press Y.
To confirm the prosody installation is success, run this command again, and make sure the version is 0.11
prosodyctl about
Cleaning Unused Files & Service
Note: Do this step on the main server
Remove default site config files on nginx
rm /etc/nginx/sites-enabled/default
rm /etc/nginx/sites-available/default
Stop & disable jitsi videobridge as it will be running on the second server, not on the main server
service jitsi-videobridge2 stop
systemctl disable jitsi-videobridge2
Prosody Configuration
Note: Do this step on the main server
Open global prosody configuration file /etc/prosody/prosody.cfg.lua and add this configuration at the top of the file:
component_interface = "0.0.0.0"
compinent_ports = { 5347 }
network_backend = "epoll"
daemonize = false
Also, add the include configuration at the bottom of the file
include "conf.d/*.cfg.lua"
Save & Exit
Now, open your site configuration file
nano /etc/prosody/conf.d/<your.domain.com>.cfg.lua
Add cross_domain_websocket and consider_websocket_secure configuration
...

cross_domain_bosh = false;
consider_bosh_secure = true;
cross_domain_websocket = true;
consider_websocket_secure = true;

...
Find your domain virtual host configuration and change the authentication to internal_hashed
...

VirtualHost "<your.domain.com>"
    -- enabled = false -- Remove this line to enable this host
    authentication = "internal_hashed"
    -- Properties below are modified by jitsi-meet-tokens package config
    -- and authentication above is switched to "token"
    --app_id="example_app_id"
    --app_secret="example_app_secret"

...
Add websocket and smacks module
...
    modules_enabled = {
        "bosh";
        "pubsub";
        "ping"; -- Enable mod_ping
        "speakerstats";
        "external_services";
        "conference_duration";
        "muc_lobby_rooms";
        "muc_breakout_rooms";
        "av_moderation";
        "websocket";
        "smacks";
    }
...
Add a guest virtual host to enable the guest user at the bottom of the file
. . .

VirtualHost "guest.<your.domain.com>"
    authentication = "anonymous"
    c2s_require_encryption = false
    modules_enabled = {
        "muc_lobby_rooms";
        "speakerstats";
        "conference_duration";
    }
    lobby_muc = "lobby.<your.domain.com>"
    main_muc = "conference.<your.domain.com>"
    muc_lobby_whitelist = { "recorder.<your.domain.com>" }
    speakerstats_component = "speakerstats.<your.domain.com>"
    conference_duration_component = "conferenceduration.<your.domain.com>"
Change the <your.domain.com> to your actual domain name. And then save & exit.
Before starting the prosody you can check whether there is an error in the configuration by running this command
prosodyctl status
Delete the current systemd file
rm /etc/systemd/system/prosody.service
Create a new prosody systemd file
nano /etc/systemd/system/prosody.service
Copy & Paste this script to the file
[Unit]
Description=Prosody XMPP Server

[Service]
Type=simple
StandardInput=null
StandardOutput=null
StandardError=null

User=prosody
Group=adm
WorkingDirectory=/var/lib/prosody

PIDFile=/var/run/prosody/prosody.pid
ExecStart=/usr/bin/prosody
ExecReload=/bin/kill -HUP $MAINPID
Restart=on-abnormal

[Install]
WantedBy=networking.target
Create the prosody folder for pid
mkdir /var/run/prosody
chown -R prosody:adm /var/run/prosody
Change the ownership of the prosody configuration folder
chown -R prosody:adm /etc/prosody
Reload the systemd and enable prosody
systemctl daemon-reload
systemctl enable prosody
Finally, start the prosody service again
service prosody start
Create Prosody User
Create a new user to login into the conference via prosody
prosodyctl register <username> <your.domain.com> <password>
To confirm the user is registered, you can check your data here:
cat /var/lib/prosody/<your%2edomain%2ecom>/accounts/<username>.dat
This is the user for the conference, we will test it later when the whole installation process is done
Jicofo Configuration
Note: Do this step on the main server
Let’s tweak the jicofo configuration to enable the secure domain. Open the jicofo configuration file
nano /etc/jitsi/jicofo/jicofo.conf
Add the marked configuration so the jicofo configuration is like this
jicofo {
  xmpp: {
    client: {
      client-proxy: focus.<your.domain.com>
    }
    trusted-domains: [ "recorder.<your.domain.com>" ]
  }
  authentication: {
    enabled: true
    type: XMPP
    login-url: <your.domain.com>
  }
  bridge: {
    brewery-jid: "[email protected].<your.domain.com>"
  }
}
After configuring the jicofo, restart the service
service jicofo restart
Jitsi-Meet Configuration
Note: Do this step on the main server
To enable the secure domain, we must also tweak the jitsi-meet configuration file. Open the jitsi-meet configuration file:
nano /etc/jitsi/meet/<your.domain.com>-config.js
Find the anonymousdomain configuration and config the domain properly
    // When using authentication, domain for guest users.
    anonymousdomain: 'guest.<your.domain.com>',
Also, find the websocket configuration and uncomment it (the default is commented) to enable the WebSocket capabilities.
    // Websocket URL
    websocket: 'wss://<your.domain.com>/xmpp-websocket',
Bellow that, add the openBridgeChannel config
    websocket: 'wss://$lt;your.domain.com$gt;/xmpp-websocket',
    openBridgeChannel: 'websocket',
Save & Exit
Check your JVB Password
Note: Do this step on the main server
Yes, we don’t use the jvb on this server, in this step we just want to check the jvb password so we can use it in the new jvb later.
You can check the password by looking at your videobridge sip-communicator configuration.
cat /etc/jitsi/videobridge/sip-communicator.properties | grep PASSWORD
It will return your password just like this
org.jitsi.videobridge.xmpp.user.shard.PASSWORD=RvqxDnlH
This password will be used by jvb on the jvb server to connect to prosody
Install Jitsi Videobridge
Note: Do this step on the jvb server
Install dependencies library
apt update && apt install apt-transport-https make nginx && apt-add-repository universe
The nginx in this server will be used to terminate the wss, so the jvb will only handle the plain ws hence improving the jvb performance.
Add jitsi repository to package manager
curl https://download.jitsi.org/jitsi-key.gpg.key | sudo sh -c 'gpg --dearmor > /usr/share/keyrings/jitsi-keyring.gpg'
echo 'deb [signed-by=/usr/share/keyrings/jitsi-keyring.gpg] https://download.jitsi.org stable/' | sudo tee /etc/apt/sources.list.d/jitsi-stable.list > /dev/null
Update your repository
apt update
Finally, install the same version of videobridge with the main server
apt install jitsi-videobridge2=2.1-634-gff8609ad-1
You will be asked the domain, input the domain of the main server not the jvb domain.
JVB Configuration
Note: Do this step on the jvb server
Open /etc/jitsi/videobridge/sip-communicator.properties and then modify the configuration
org.ice4j.ice.harvest.DISABLE_AWS_HARVESTER=true
org.ice4j.ice.harvest.STUN_MAPPING_HARVESTER_ADDRESSES=meet-jit-si-turnrelay.jitsi.net:443
org.jitsi.videobridge.ENABLE_STATISTICS=true
org.jitsi.videobridge.STATISTICS_TRANSPORT=muc,colibri
org.jitsi.videobridge.xmpp.user.shard.HOSTNAME=<your.domain.com>
org.jitsi.videobridge.xmpp.user.shard.DOMAIN=auth.<your.domain.com>
org.jitsi.videobridge.xmpp.user.shard.USERNAME=jvb
org.jitsi.videobridge.xmpp.user.shard.PASSWORD=RvqxDnlH
org.jitsi.videobridge.xmpp.user.shard.MUC_JIDS=[email protected].<your.domain.com>
org.jitsi.videobridge.xmpp.user.shard.MUC_NICKNAME=<jvb-id>
org.jitsi.videobridge.xmpp.user.shard.DISABLE_CERTIFICATE_VERIFICATION=true

# JVB Websocket Configuration
org.jitsi.videobridge.rest.jetty.port=9090
org.jitsi.videobridge.rest.COLIBRI_WS_DISABLE=false
org.jitsi.videobridge.rest.COLIBRI_WS_TLS=true
org.jitsi.videobridge.rest.COLIBRI_WS_DOMAIN=<your.jvb.domain>
org.jitsi.videobridge.rest.COLIBRI_WS_SERVER_ID=<jvb-id>
<jvb-id> is a unique string that mark your jvb, it can be anything like jvb-1, media-1, or even a hash like acdnc76yi23cjen9g38jkdjm3azq. But note that it will be used in the Nginx configuration when configure the wss proxy.
If your JVB server is behind NAT, also add these 2 statement on this file
org.ice4j.ice.harvest.NAT_HARVESTER_LOCAL_ADDRESS=<Local.IP.Address>
org.ice4j.ice.harvest.NAT_HARVESTER_PUBLIC_ADDRESS=<Public.IP.Address>
Nginx WSS Proxy Configuration
Note: Do this step on the jvb server
create a file for handling WebSocket
nano /etc/nginx/sites-available/videobridge.conf
copy & paste this config
server {
        listen 443 ssl;
        server_name <your.jvb.domain>;

        ssl_protocols TLSv1.1 TLSv1.2;
        ssl_certificate /path/to/<your.jvb.domain>.crt;
        ssl_certificate_key /path/to/<your.jvb.domain>.key;

        location ~ ^/colibri-ws/<jvb-id>/(.*) {
                proxy_pass http://127.0.0.1:9090/colibri-ws/<jvb-id>/$1$is_args$args;
                proxy_http_version 1.1;
                proxy_set_header Upgrade $http_upgrade;
                proxy_set_header Connection "upgrade";
                proxy_set_header Host $host;
                tcp_nodelay on;
        }
}
Don’t forget to adjust the <your.jvb.domain>, <jvb-id> & SSL certificate.
Create link and reload NGINX
ln -s /etc/nginx/sites-available/videobridge.conf /etc/nginx/sites-enabled/
nginx -t
service nginx reload
Restart All Jitsi Services
On the main server, restart jicofo and prosody
service prosody restart
service jicofo restart
On jvb server, restart videobridge
service jitsi-videobridge2 restart
Checking All Installation
To make sure all setup is success, first, you can check the jicofo log
grep 'Added brewery instance' /var/log/jitsi/jicofo.log
You should see your videobridge nickname there. This is the sign that your videobridge is already connected to jicofo
Open your browser and open this url
https://<your.jvb.domain>/colibri-ws/<jvb-id>/
It will return a message like this
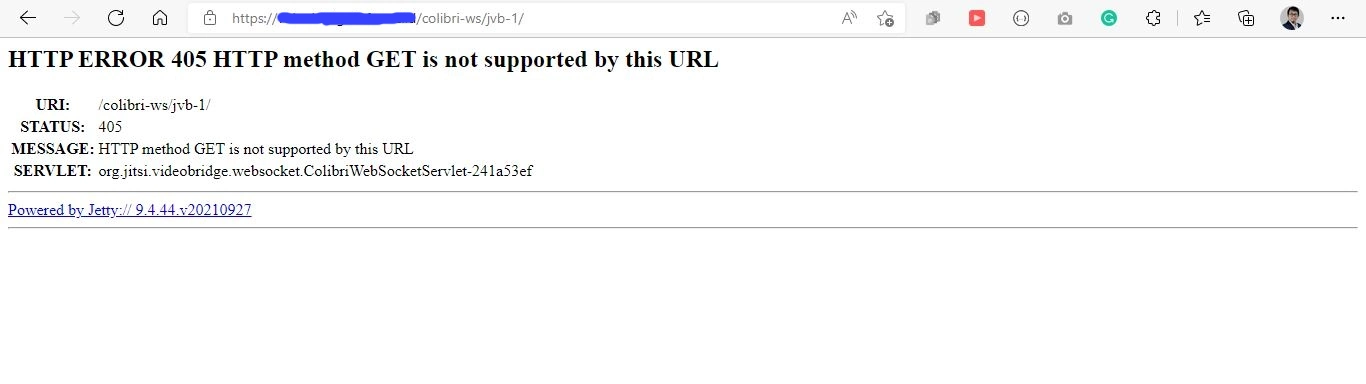
If the error code is 405, it is ok. You must recheck the JVB Installation and Configuration if you got an error code other than 405.
Next, open this url
https://<your.domain.com>/xmpp-websocket
It will return a message like this
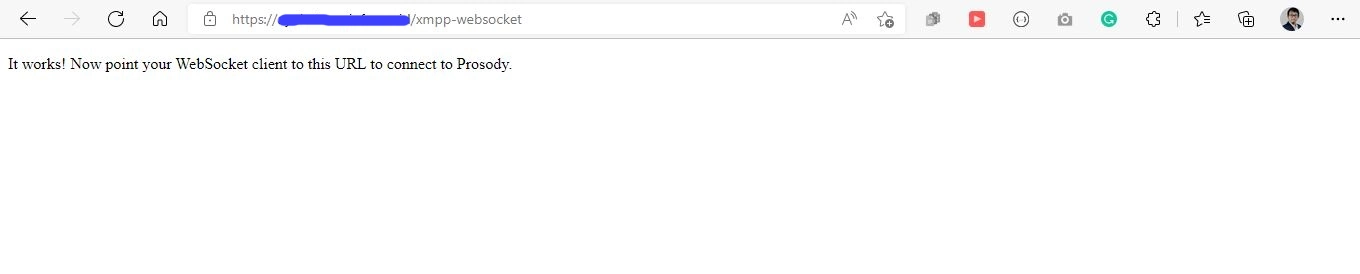
If you got error code 404 or another error, you should check the prosody configuration again.
Create Your FIrst Conference
Open your browser and visit <your.domain.com>. And then create a conference. You will be asked to login to the conference.
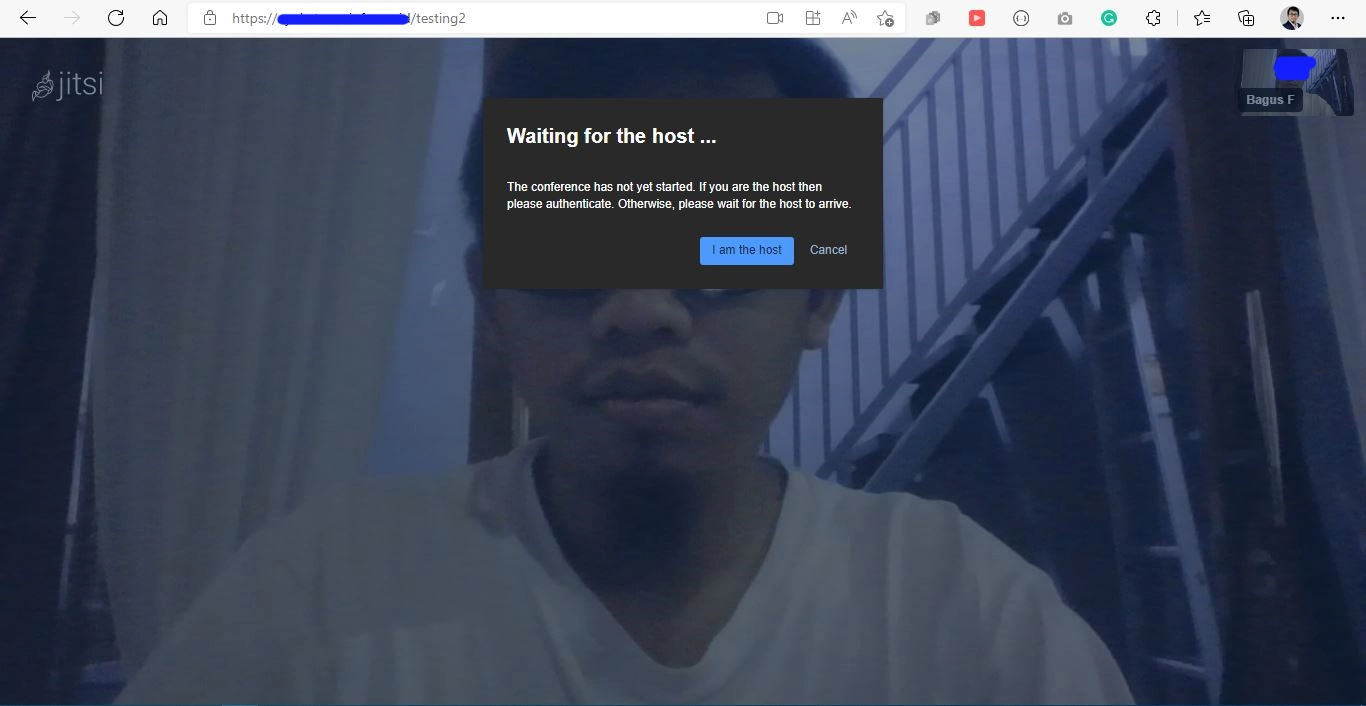
Here, you can use the <username> and <password> that you create using the prosodyctl register command earlier. Aaaand.. congrats! you successfully install the jitsi conference platform using multi-server configuration!
Extra
To add more Videobridge, just install the jitsi-videobridge on the new server and follow the Install Jitsi Videobridge section below.